Fuel tank worries
-
RobHomewood
- Posts: 334
- Joined: Tue Oct 22, 2013 8:04 pm
Fuel tank worries
I am preparing to fit a fuel sender unit in my fuel tank (and reserve switch unit too in due course) but am unsure whether it is better to drain the fuel and have the explosive fumes remaining in the tank or leave the fuel in the tank. I shall be adding an earth wire which it seems should be on the reserve switch unit to the chassis but as this is new to me I would appreciate some practical safety hints. Is there for instance a method of ridding the fumes from the tank if I empty it ? Or am I worrying unnecessarily? I took one screw out of the current blanking plate and was hit by fumes straightaway but I think I may have some scraping to do to remove the old sealant! ('39 14 DHC)
-
paul williams

- Posts: 238
- Joined: Wed Sep 24, 2008 12:47 pm
- Location: Telford,Shropshire
- Contact:
Re: Fuel tank worries
Hello Rob,
welcome to the forum. I have worked on a number of fuel tanks over the years. In my opinion it is always best to drain the tank both for safety reasons and because an old tank can have a lot of bits in it.
I would recommend removing the tank if you can, draining it and washing it out with water then waiting for it to dry. I have successfully used a tank sealer http://www.frost.co.uk/por15-fuel-tank-sealers.html in the past which adds a lining inside and cures any problems with porosity etc.
When welding/brazing a fuel tank I would take the tank out, rinse with water and also leave some water in the tank without affecting the repair.
I hope the above helps, just one more word of advice, if possible work in a well ventilated area preferably outside.
Paul Williams
1929 2litre Saloon
1934 P1 10HP
1951 Rover Cyclops
1974 P6 3500
1998 LR Discovery I
-
RobHomewood
- Posts: 334
- Joined: Tue Oct 22, 2013 8:04 pm
Re: Fuel tank worries
Thanks Paul for your advice. I really dont want to remove the tank if I can help it but I will look at draining and washing as you say.
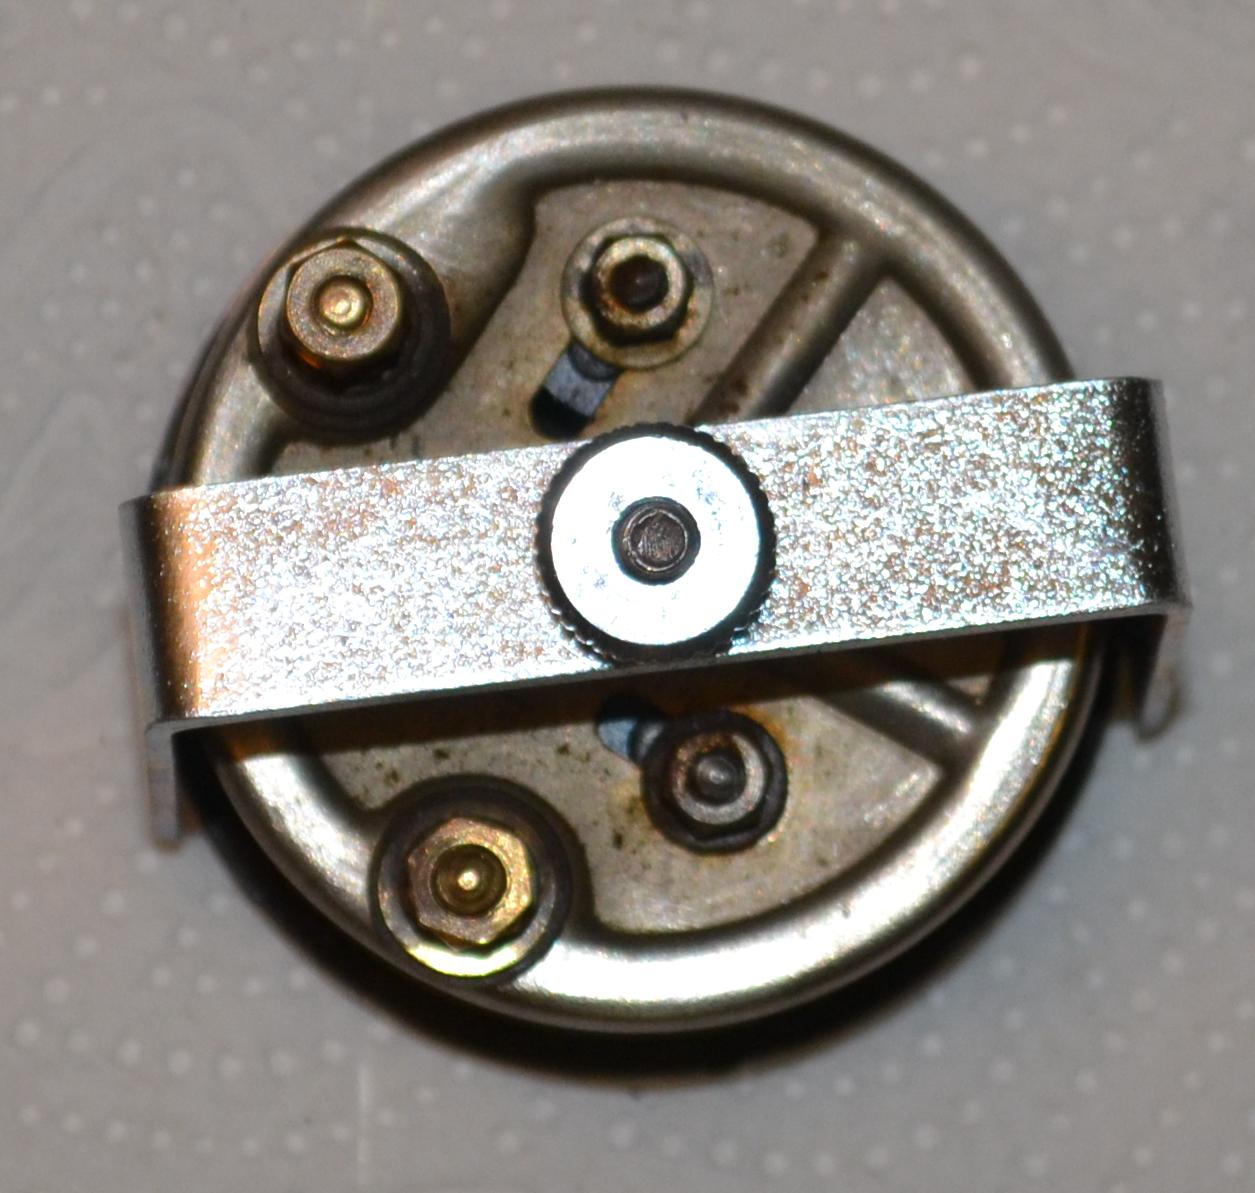
Before I do that though I have a problem with the fuel gauge which I would appreciate some help with if anyone knows the answer. The only wire left on my gauge (its been out of use some time) is the one from the oil level switch to eth terminal marked B so I added a new one as per teh wiring diagram from the voltage regulator to the other terminal marked T on the gauge. I was set to test the sender unit before installing it. However as soon as I then try to put the gauge in positon in the dash with ignition on, it flicks to 'full' whatever position of the sender unit. Actually it does this even with the sender completely disconnected. I guess it is shorting to earth as the connection post does not seem insulated from the body. Am I missing something? I see from the advice on testing these units that the T terminal is for Tank and B is Battery normally but has this be reversed because it is a positive earth car? I cant see how to send a pic sorry.
Before I do that though I have a problem with the fuel gauge which I would appreciate some help with if anyone knows the answer. The only wire left on my gauge (its been out of use some time) is the one from the oil level switch to eth terminal marked B so I added a new one as per teh wiring diagram from the voltage regulator to the other terminal marked T on the gauge. I was set to test the sender unit before installing it. However as soon as I then try to put the gauge in positon in the dash with ignition on, it flicks to 'full' whatever position of the sender unit. Actually it does this even with the sender completely disconnected. I guess it is shorting to earth as the connection post does not seem insulated from the body. Am I missing something? I see from the advice on testing these units that the T terminal is for Tank and B is Battery normally but has this be reversed because it is a positive earth car? I cant see how to send a pic sorry.

Re: Fuel tank worries
In Firefox right click on the following pictures and select “view picture” to see a clear high definition picture. In Chrome and internet explorer just zoom out.
This is the wiring diagram of the instrument panel:
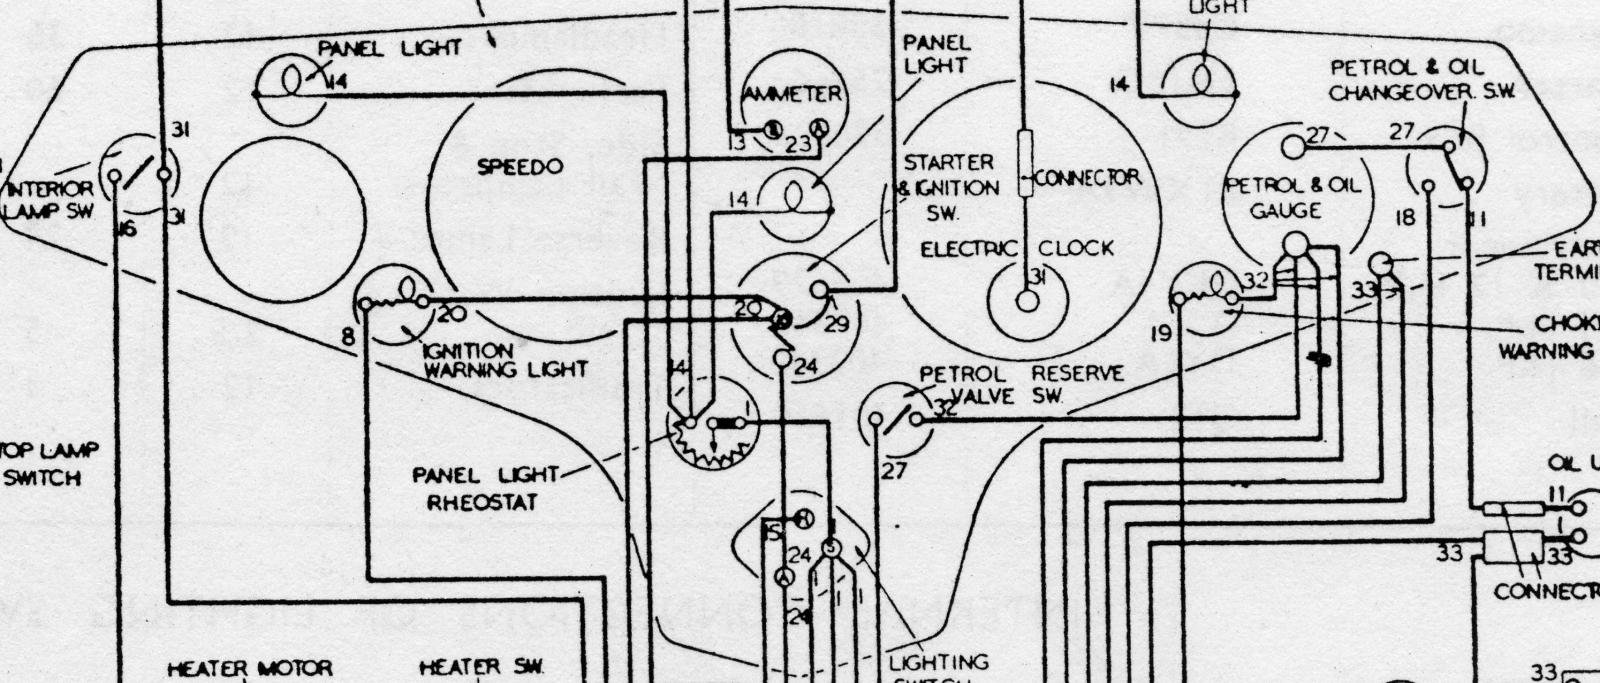
This drawing represents every wire and instrument in its correct position, from behind the panel.
The terminal of the petrol/oil gauge marked ‘B’ is connected to the accessories fuse of the control box regardless of polarity (it does not matter if it is positive or negative ground). The terminal marked ‘T’
is connected to the center terminal of the petrol & oil changeover switch (Lucas 50316A)
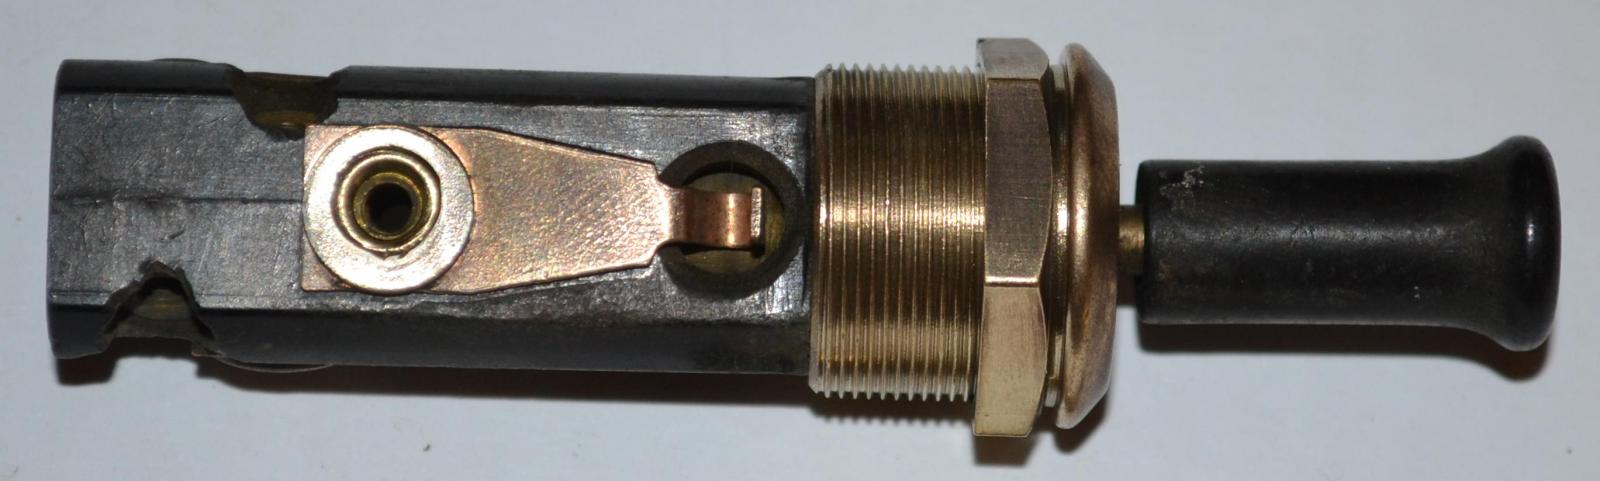
The bottom terminal of that switch is connected to the oil unit, and the top terminal to the petrol unit.
Notice that the terminal of the petrol unit is connected to the slider of a variable resistor. The other side of that resistor is connected to the body of the unit, and should be grounded. Usualy it is grounded simply by the screws fastening it to the petrol tank. The gauge will read full with high resistance (~100 Ohm) and empty with minimum resistance. Therefore as long as you don’t ground the unit it will show “full” regardless of its state.
This is the wiring diagram of the instrument panel:
This drawing represents every wire and instrument in its correct position, from behind the panel.
The terminal of the petrol/oil gauge marked ‘B’ is connected to the accessories fuse of the control box regardless of polarity (it does not matter if it is positive or negative ground). The terminal marked ‘T’
is connected to the center terminal of the petrol & oil changeover switch (Lucas 50316A)
The bottom terminal of that switch is connected to the oil unit, and the top terminal to the petrol unit.
Notice that the terminal of the petrol unit is connected to the slider of a variable resistor. The other side of that resistor is connected to the body of the unit, and should be grounded. Usualy it is grounded simply by the screws fastening it to the petrol tank. The gauge will read full with high resistance (~100 Ohm) and empty with minimum resistance. Therefore as long as you don’t ground the unit it will show “full” regardless of its state.
-
RobHomewood
- Posts: 334
- Joined: Tue Oct 22, 2013 8:04 pm
Re: Fuel tank worries
Thanks Luli for your helpful comments and pics. Your wiring diagram is for a slightly later model I think (I do have one for the 39 model - which I have blown up to A1 size colour coded for use in the garage (not that I can tell the colours on the original wires because they have faded so much but I am trying to put any missing ones back in the correct colour).
So it looks as though the wire from the oil switch has been connected to the wrong terminal on the gauge sometime in the past and not used since. I look forward to having another go when I get some more time.
So it looks as though the wire from the oil switch has been connected to the wrong terminal on the gauge sometime in the past and not used since. I look forward to having another go when I get some more time.
-
chris dancey
- Posts: 386
- Joined: Tue Oct 20, 2009 8:20 pm
- Location: Brighton & Paphos, Cyprus
Re: Fuel tank worries
With reference to the petrol tank. I would add a further comment. With the ethanol in fuel issues, it is better to either keep the tank as full as possible ( ethanol is hygroscopic, which means basically it will attract moisture to itself ) or if you wish to empty the tank to complete welding repairs I would suggest steam cleaning the tank to be totally sure of no residue gas. There have been fatalities where a tank has not been fully degassed before welding / brazing repairs have been undertaken.
1934 ( 1935 model ) P1 '10' Saloon RD 6160
1935 P1 '10' Saloon ( originally JB 6729 ) now VSJ 156
1946 P2 '14' Sports Saloon KPG 855
1933 MG J2 Cycle Wing Model APB 560
1933 MG J2 Competition Model ALX 124
1935 P1 '10' Saloon ( originally JB 6729 ) now VSJ 156
1946 P2 '14' Sports Saloon KPG 855
1933 MG J2 Cycle Wing Model APB 560
1933 MG J2 Competition Model ALX 124